7 Steps to the Perfect Protein Balls Recipe: Your Best No-Bake Snack
Table of Contents
Introduction
In the fast-paced world of modern wellness, finding healthy, convenient snacks can feel like a quest for the Holy Grail. We need fuel that is quick, delicious, and genuinely good for us. Enter the protein balls recipe: a customizable, no-bake wonder that has revolutionized healthy snacking.
These tiny powerhouses, also known as energy balls, are more than just a passing trend. They are a staple for busy professionals, parents, fitness enthusiasts, and anyone looking for a sustained burst of energy without the sugar crash. Forget expensive, preservative-laden protein bars; learning how to make protein balls at home gives you complete control over your ingredients.
This ultimate guide will walk you through the essential steps, ingredients, and variations—including the wildly popular peanut butter protein balls—to create the best protein snacks you’ve ever tasted. We’ll ensure your homemade protein balls are perfectly textured, flavor-packed, and ready to grab-and-go.
🚀 Why Protein Balls Are the Best Healthy Snacks
Before diving into the protein balls recipe, let’s understand why these little bites deserve a permanent spot in your fridge. Often interchangeably called energy bites, these snacks offer a superior nutritional profile compared to traditional processed treats.
1. Sustained Energy and Satiety
The core benefit of any protein ball recipe is its balanced macronutrient ratio. By combining complex carbohydrates (usually oats), healthy fats (nut butter), and protein (from powder or nut butter), they deliver energy that lasts. Unlike simple sugars, the fiber from the oats and the protein from the supplement/nuts slow down digestion. This means a single protein ball keeps you full and focused far longer than a handful of chips or a cookie. They are truly the foundation of any list of best healthy protein snacks.
2. The Power of “No-Bake” Convenience
The term no bake protein balls isn’t just a descriptor; it’s a commitment to convenience. In less than 15 minutes, you can mix, roll, and refrigerate an entire batch. There’s no oven time, no cooling racks, and minimal clean-up. This makes the energy balls recipe perfect for meal prep, allowing you to stock up on easy healthy snacks for the week ahead. When you need a quick boost, these no bake energy bites are far superior to hitting a vending machine.
3. Ultimate Customization
The basic protein ball recipe is a blank canvas. Whether you need protein balls with protein powder for a post-workout boost or prefer a simple protein balls recipe without protein powder using just nuts and oats, you can tailor it to your dietary needs (vegan, gluten-free, keto, etc.) and flavor preferences (chocolate, cinnamon, coconut, etc.). The flexibility is unparalleled, making it the perfect snack recipes solution for everyone in the family.
The Master Protein Balls Recipe: 7 Simple Steps
This foundational protein ball recipe is the base for almost all variations, including the popular peanut butter protein balls. Once you master this process, you can effortlessly swap ingredients.
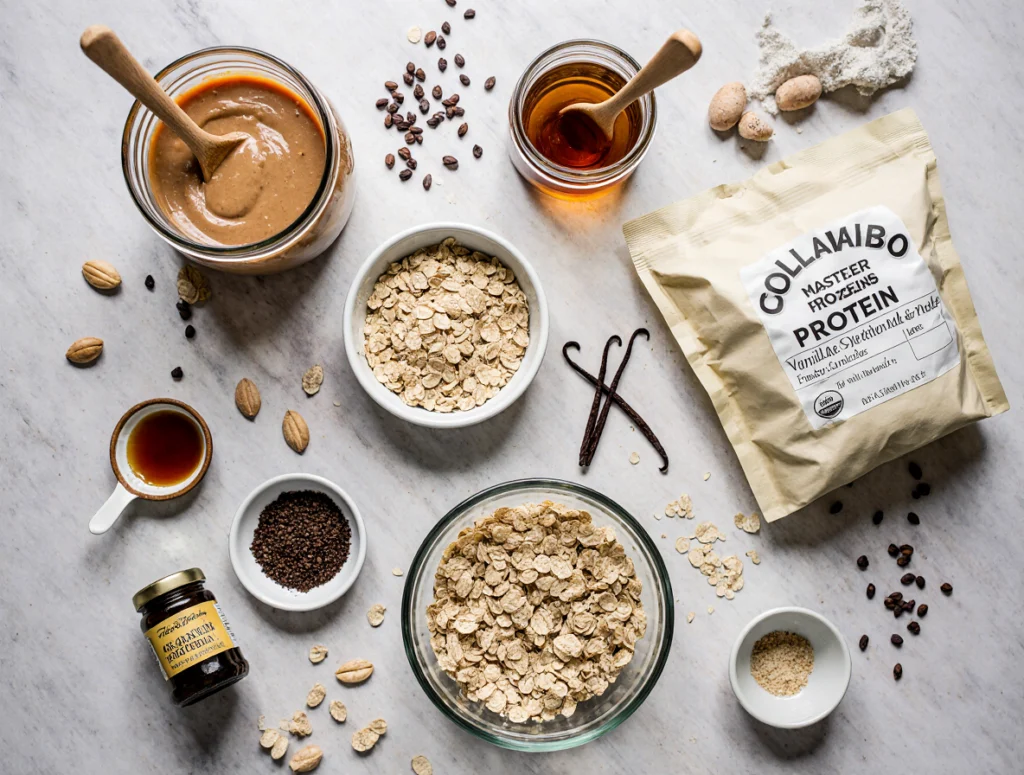
Ingredients
- 1 cup Old-Fashioned Rolled Oats (The basis for many oatmeal protein balls)
- 1/2 cup Creamy Peanut Butter (or Almond/Cashew butter)
- 1/3 cup Honey or Maple Syrup (The binder and sweetener)
- 1/4 cup Protein Powder (Optional, but increases the protein ball protein content)
- 1/4 cup Flaxseed Meal or Chia Seeds (For healthy fats and fiber)
- 1 tsp Vanilla Extract
- A pinch of salt
Equipment
- Large Mixing Bowl
- Measuring Cups and Spoons
- A Sturdy Spatula or Wooden Spoon
- A Baking Sheet lined with parchment paper
Step 1: The Dry Ingredients Base
In your large mixing bowl, combine the rolled oats and the flaxseed/chia seeds. If you are using oats for energy, ensure they are old-fashioned rolled oats, not quick-cook, as the texture holds up better and the fiber content is higher. If your recipe includes protein powder (adding substantial protein ball protein), mix that in now as well.
Step 2: Combining the Wet Components
In a separate, smaller bowl (or microwave-safe container), gently warm the peanut butter and honey/maple syrup together for about 30 seconds. This makes them more pliable and easier to mix. Stir in the vanilla extract and the pinch of salt. For peanut butter protein balls, this step is crucial for achieving that signature creamy texture.
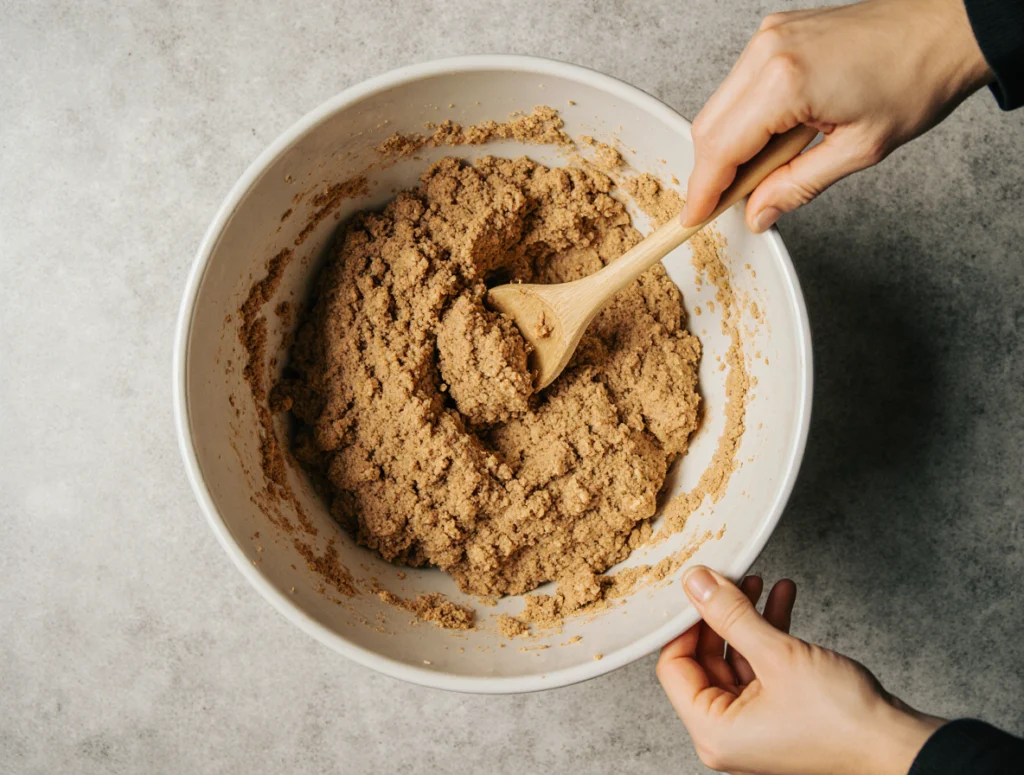
Step 3: Creating the Master Dough (The Mix)
Pour the warm, wet mixture over the dry ingredients. Use your spatula to thoroughly combine everything. The goal is to hydrate the oats and flaxseed, creating a stiff, sticky “dough.” If the mixture seems too dry or crumbly, add a teaspoon of water or milk (dairy or non-dairy) at a time until the mixture holds together when pressed. If it’s too wet, add a tablespoon of extra oats or protein powder. This consistency check is key for successful no bake protein balls.
Step 4: The Chill Time (Critical for Rolling)
Cover the bowl and refrigerate the mixture for at least 30 minutes. Do not skip this step! Chilling allows the oats to absorb the moisture and the fats to firm up, making the dough less sticky and much easier to roll into perfect energy bites. The firm texture also enhances the experience of eating best protein snacks.
Step 5: Roll Your Protein Balls
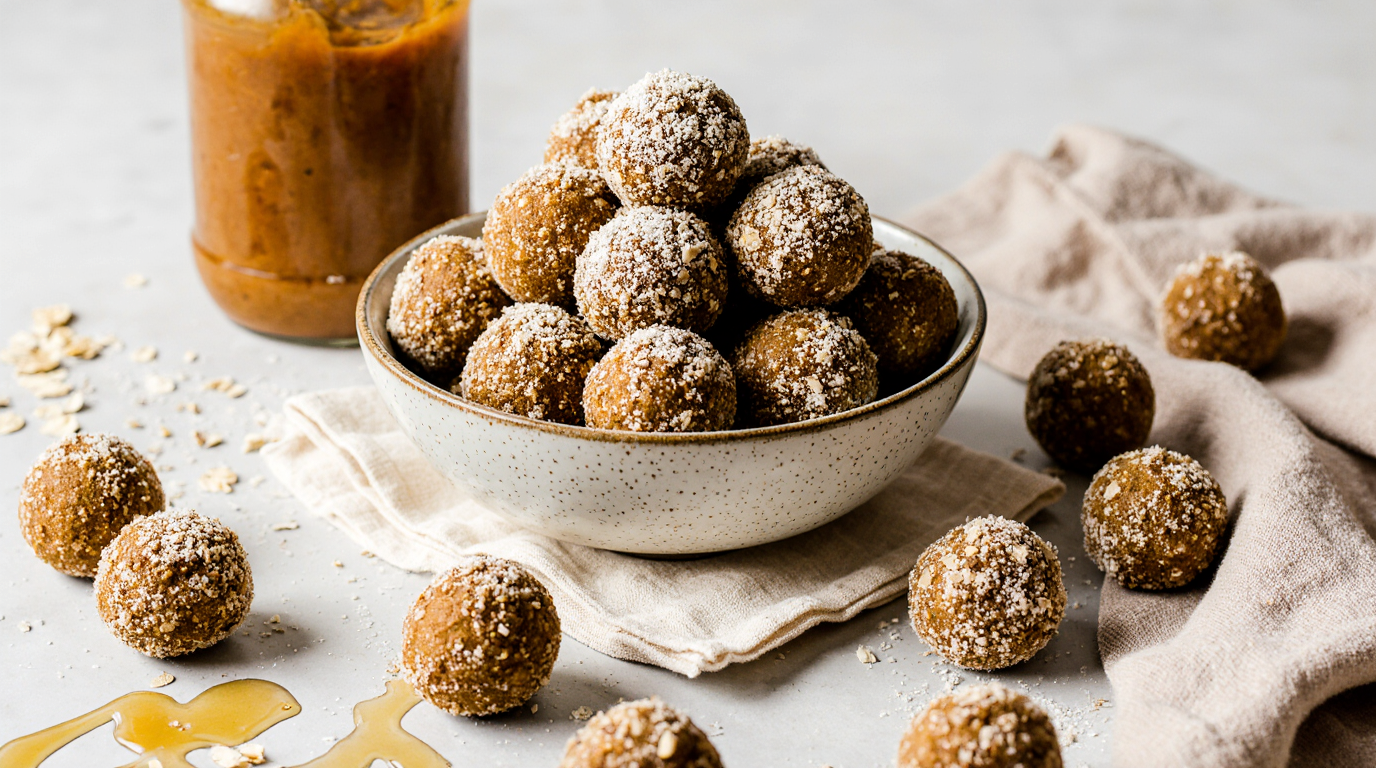
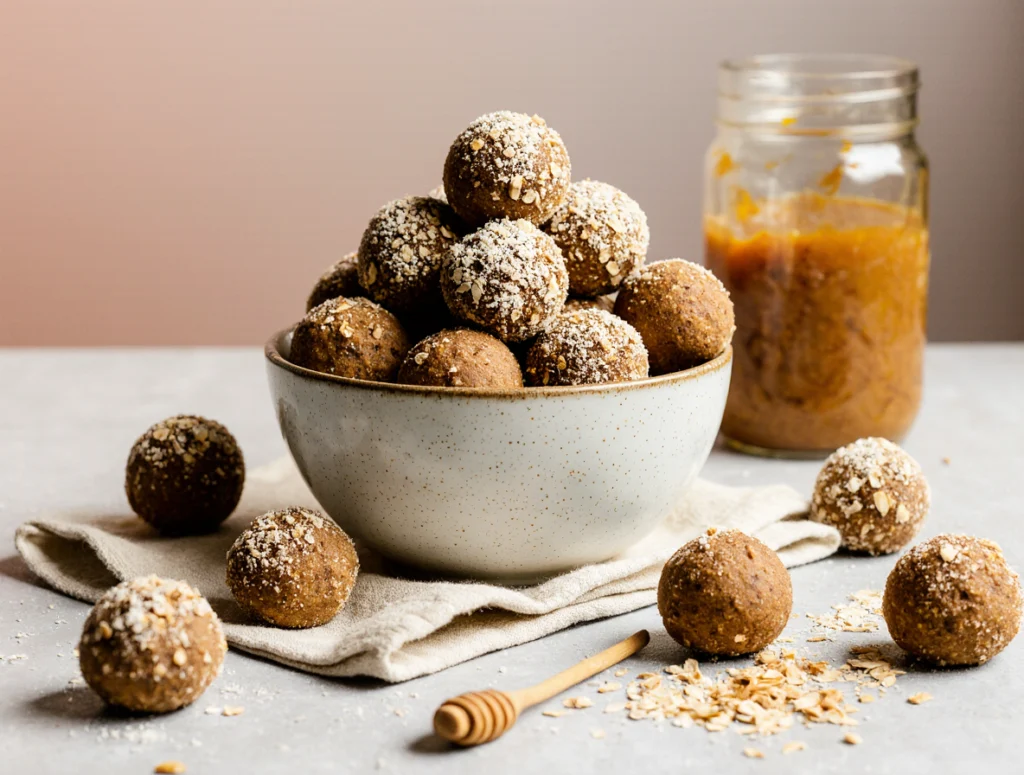
Using a small cookie scoop or a tablespoon, measure out portions of the chilled mixture. Roll the portions between your palms to form smooth, uniform protein balls approximately 1 to 1.5 inches in diameter. Place the finished protein ball recipe on the lined baking sheet.
Step 6: Optional Coatings and Finishes
For extra flavor and visual appeal, roll the finished protein balls in coatings.
- For a richer flavor: Cocoa powder or finely shredded coconut.
- For a crunch: Finely chopped nuts or mini chocolate chips.
- For a classic look: A light sprinkle of extra oats.
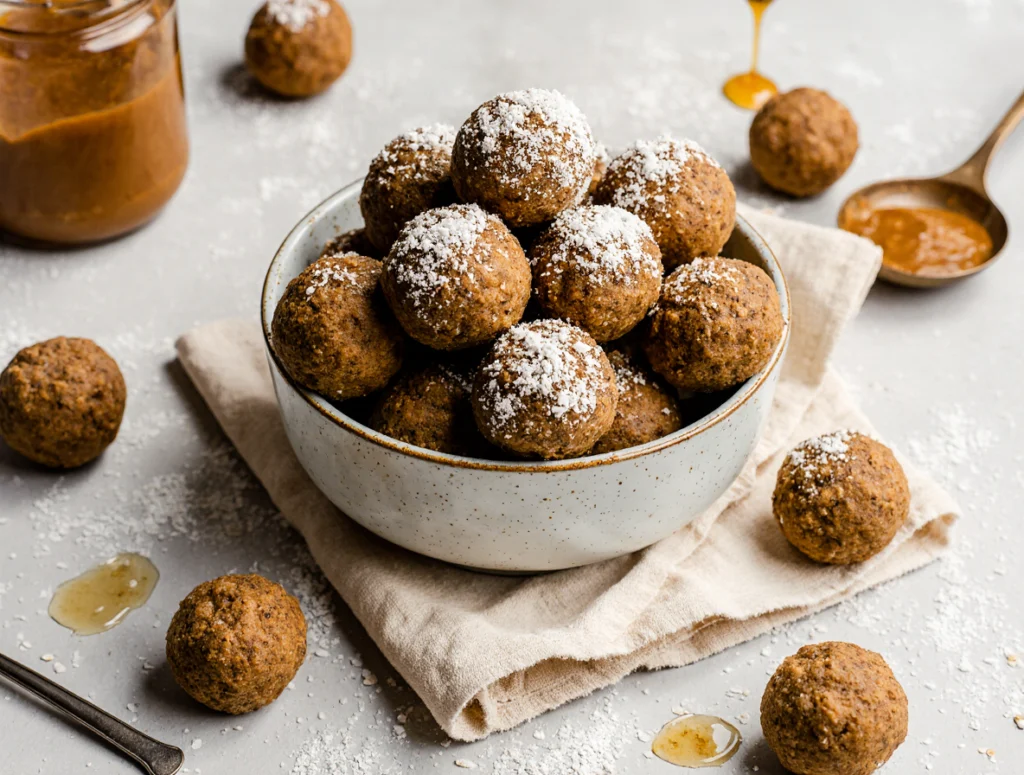
Step 7: Final Setting and Storage
Return the rolled and coated energy balls to the refrigerator for a final 15-20 minutes to set completely. Once firm, transfer them to an airtight container. They will last for up to 1-2 weeks in the refrigerator or up to 3 months in the freezer.
🥜 The Popularity of Peanut Butter Protein Balls
When people search for a protein ball recipe, the overwhelming favorite is the peanut butter protein balls. This variation is the ultimate comfort snack, blending the beloved taste of peanut butter with a healthy twist.
The reason for the enduring love of protein balls peanut butter style lies in the peanut butter itself:
- Binding Agent: Peanut butter is naturally sticky and fatty, making it the perfect, no-fail binder for protein balls no bake recipes.
- Flavor Profile: The rich, salty flavor of peanut butter masks the sometimes-chalky taste of protein ball protein powder better than most other nut butters.
- Nutrient Density: Peanut butter provides both plant-based protein and healthy monounsaturated fats, adding depth to the nutritional value of the protein ball recipe.
If you are specifically making peanut butter energy balls, you might only need three ingredients: peanut butter, oats, and honey. This is the ultimate high-fiber three-ingredient snack recipes version, proving that the best energy bites recipe doesn’t have to be complicated.
Variations and Customizations for Your Energy Balls
The beauty of the energy balls recipe is its adaptability. Here are various ways to modify the core protein balls recipe for different dietary needs and flavor cravings.
1. Chocolate Lovers’ Delight
For a rich, decadent version, try chocolate peanut balls or simple chocolate protein balls.
- Add-ins: 2 tablespoons of unsweetened cocoa powder to the dry ingredients.
- Boost: Use chocolate-flavored protein ball protein powder.
- Finishing touch: Stir in a handful of mini chocolate chips.
2. High-Protein/Keto Versions
If you are prioritizing protein ball protein content or following a low-carb diet, focus on the binders.
- Swap Oats: Replace oats with finely ground nuts (almonds/walnuts) and coconut flour for a keto protein balls base.
- Binder: Use a seed butter (sunflower/tahini) and a low-carb sweetener like stevia or erythritol syrup.
3. Protein Balls Without Protein Powder
If you want to make easy protein balls without supplements, you can still boost the protein. This is a great option for easy no bake recipes for kids.
- Boosters: Add extra nut butter, and mix in hemp seeds, ground nuts, or powdered peanut butter instead of a standard protein ball protein powder. This simple version makes a perfect oatmeal peanut butter balls snack.
4. Flavor and Spice Combinations
- Tropical: Add lime zest and shredded coconut.
- Autumn Spice: Use pumpkin puree (reduce liquid binder accordingly) and pumpkin pie spice.
- Cinnamon Roll: Add cinnamon and a tablespoon of cream cheese (blended into the wet ingredients) for a richness that makes them taste like a no bake peanut butter cheesecake balls flavor.
The Nutritional Science of Protein Balls
Understanding the components of your protein ball recipe helps appreciate why they are categorized as best protein snacks.
The Role of Oats (Oatmeal Protein)
The oats provide complex carbohydrates and an essential type of fiber called beta-glucan. This fiber is scientifically proven to help lower cholesterol and manage blood sugar. When you make oatmeal protein balls, you’re getting a powerful health boost alongside your protein. Furthermore, the combination of oatmeal protein and healthy fats provides a slow, steady release of glucose into the bloodstream, preventing the “spike and crash” associated with sugary treats.
Understanding Protein Ball Protein
The protein in these protein balls comes from two sources:
- Nut Butter: Peanuts, almonds, and cashews are rich in vegetable protein, making simple peanut butter oats balls a surprisingly complete snack.
- Protein Powder: Adding a scoop of whey, casein, or plant-based protein powder turns a simple energy ball into a serious muscle-repairing treat. This makes them ideal protein energy balls for post-workout recovery.
For those tracking macros, a standard protein balls recipe with protein powder usually delivers 5-8 grams of protein per ball, making it a highly effective component of your high protein snack recipes.
Why Energy Bites Are Perfect for Meal Prep
The term energy bites perfectly encapsulates their purpose: small, concentrated units of fuel. This makes them ideal for modern living and a must-include in your weekly meal prep routine.
Longevity and Storage
As a category of no bake energy balls, they excel in storage. Due to their high fat content and low water activity, they keep beautifully.
- Refrigerator: 1-2 weeks in an airtight container.
- Freezer: For long-term storage, flash freeze the protein balls on a baking sheet, then transfer them to a freezer-safe bag. This makes for super convenient, pre-portioned power balls that you can grab on the run. They thaw quickly at room temperature, often ready in 10-15 minutes.
Portion Control
The small, uniform size of protein balls (or energy bits) makes portion control simple. You know exactly what you are eating, which is often difficult with larger snacks like cookies or granola bars. They are designed to be a satisfying two-bite snack.
Versatile Timing
These aren’t just for mid-day slumps. Homemade protein balls are versatile:
- Pre-Workout: A few protein balls 30 minutes before a workout provides sustainable energy.
- Post-Workout: Use the protein balls recipe with protein powder for muscle recovery.
- Breakfast: Some people call them breakfast balls because they are so filling and easy to eat on the go.
Troubleshooting Your Protein Ball Recipe
Even the simplest easy protein balls can go wrong. Here are common problems and quick fixes.
1. Too Sticky to Roll
Problem: The ratio of wet ingredients (nut butter, syrup) to dry ingredients (oats, protein powder) is off, or you skipped the chill time. Fix: Add 1 tablespoon of extra oats or protein powder. If using oatmeal protein balls as a base, you can also add a pinch of coconut flour. Return to the fridge for 15 minutes.
2. Too Dry and Crumbly
Problem: Not enough binding agent, or you used too many dry additions (like too much protein powder). Fix: Add 1 teaspoon of water, milk, or a touch more melted nut butter. Mix well until it holds together when squeezed. This is particularly relevant when working with a protein ball recipe that uses various recipes with protein powder.
3. Too Hard After Refrigeration
Problem: The base recipe was too dry, or they were kept in the freezer too long and need to thaw slightly. Fix: Let them sit at room temperature for 5-10 minutes before eating. Next time, slightly increase the liquid binder (honey/syrup) for a softer texture.
External & Internal Resources for a Healthy Lifestyle
Once you have mastered your protein balls recipe, you might be looking for other ways to incorporate healthy eating into your lifestyle.
For delicious and healthy main course ideas, particularly centered around lean protein, check out the amazing recipes at My Chicken Recipes. They offer great ideas that pair well with these energy-boosting protein balls.
Additionally, for sourcing high-quality, ethically-produced nut butter for your peanut butter protein balls, look for brands committed to sustainability and minimal added sugars. A quick search for “sustainable nut butter” can lead you to better options for your best protein snacks.
Final Thoughts: The Versatility of Protein Balls
The journey to finding the perfect, reliable, and healthy snack often ends with the protein balls recipe. They successfully bridge the gap between delicious indulgence and responsible nutrition. Whether you call them protein bites, power balls, or simply yummy healthy snacks, they are a customizable, high-fiber, and protein-rich solution for modern hunger.
From the basic protein balls peanut butter version to complex protein ball recipes featuring exotic spices and fruits, the ability to control every ingredient makes this the best protein snacks category on the market.