The Ultimate Honey Jumble Recipe: 7 Secrets for Perfect Iced Biscuits
Table of Contents
Introduction
Is there a taste or smell that can instantly transport you back to childhood? For many, that powerful sensory time machine is the unique, spiced aroma and soft, yielding texture of a classic honey jumble biscuit. These iconic treats, with their distinctive knot shape and pastel pink and white icing, are more than just a biscuit; they are a edible piece of Australasian baking heritage. While many of us have fond memories of the store-bought version, particularly Honey Jumbles Arnott’s made famous, there is something truly magical about recreating this beloved classic in your own kitchen.
This comprehensive guide is your definitive resource for mastering the perfect Honey Jumble Recipe. We will walk you through seven revolutionary techniques designed to help you capture that signature soft texture, complex spiced flavor, and picture-perfect icing that defines an authentic honey jumble biscuit recipe.
This post is far more than a simple list of ingredients. It is a deep dive into the culinary science and nostalgic art of creating these timeless treats. We will explore the history behind these biscuits, the precise role of each ingredient, and the simple yet crucial techniques that separate a good homemade attempt from a truly spectacular recreation.
Whether you are a seasoned baker looking to perfect your craft or a novice wanting to bring a taste of nostalgia to your family table, this guide to making honey jumble biscuits will provide the knowledge and confidence you need. Prepare to unlock the secrets and discover why this homemade Honey Jumble Recipe will become a cherished part of your baking repertoire.
Why This Honey Jumble Recipe is a Nostalgic Game-Changer
Before we preheat the oven, it’s important to understand what makes this specific approach to creating honey jumbles so special and reliable. This recipe is engineered for success, addressing the common challenges of working with spiced dough and achieving the perfect texture.
- The Ultimate Taste of Nostalgia, Perfected: There is an undeniable emotional connection to the flavor of Honey Jumbles Arnott’s. This Honey Jumble Recipe is meticulously crafted to honor that memory while elevating it with the quality that only homemade baking can provide. By using real, high-quality honey and fresh spices, you can create a biscuit that is both comfortingly familiar and surprisingly superior in depth of flavor. This process allows you to create honey jumble biscuits that are a true tribute to the original.
- Total Control Over Quality and Ingredients: When you make a honey jumble biscuit recipe at home, you decide exactly what goes into it. You can source local, raw honey for a more complex sweetness, ensure your spices are fresh and potent, and avoid the preservatives and artificial colors often found in mass-produced versions. This control allows you to create a treat that is not only delicious but also aligned with your preferences for wholesome ingredients.
- The Joy of a Hands-On Baking Project: Unlike drop cookies, honey jumbles are a shaped biscuit, making the process a engaging and rewarding baking project. The act of rolling, cutting, and twisting the dough into their signature knots is a therapeutic and fun activity, perfect for involving the whole family. It transforms baking from a simple task into a creative experience, making the final result all the more satisfying.
- A Truly Impressive and Shareable Gift: A box of beautifully iced, homemade honey jumble biscuits is a gift that conveys genuine care and effort. Their unique appearance and beloved flavor make them a standout present for any occasion, from holiday gift baskets to a simple “thinking of you” gesture. Mastering this Honey Jumble Recipe means you always have a show-stopping, heartfelt gift at the ready.
The Science of Softness: Unlocking the Honey Jumble Texture

The hallmark of a perfect honey jumble biscuit is its uniquely soft, almost cake-like texture that remains moist for days. Achieving this requires understanding the role of key ingredients and how they interact.
The Four Pillars of a Perfect Honey Jumble Biscuit Recipe
- The Sweetener and Humectant: Honey: Honey is the star of the show, and its function goes far beyond sweetness. According to the National Honey Board, honey is a natural humectant, meaning it attracts and retains moisture from the air. This is the scientific secret to why honey jumbles stay soft for so long, unlike biscuits made with just sugar, which can become hard and crumbly. The type of honey you use will also influence the flavor; a robust honey like leatherwood or manuka will give a more distinct taste than a milder clover honey.
- The Leavening System: Baking Soda and Heat: This honey jumble biscuit recipe relies on baking soda as the primary leavening agent. When baking soda is heated, it produces carbon dioxide gas, which causes the dough to rise. The unique chemical property here is that honey is acidic, and this acidity helps to activate the baking soda, ensuring a good rise and that characteristic soft, open crumb. This reaction is fundamental to achieving the right texture rather than a dense, hard biscuit.
- The Spice Blend: A Symphony of Warmth: The warm, complex spice profile is what defines a honey jumble. While blends can vary, the core usually includes ginger, cinnamon, and mixed spice or allspice. These spices contain volatile oils that are released during baking, filling your kitchen with that iconic aroma. They are not just for flavor; these warming spices also complement the floral notes of the honey, creating a balanced and sophisticated taste profile that elevates these biscuits far beyond a simple sweet treat.
- The Icing: More Than Just Decoration: The pink and white icing is iconic, but it also serves a functional purpose. The layer of royal icing creates a protective seal that further helps to lock in the moisture of the biscuit underneath, preventing it from drying out. The sugar in the icing also provides a delightful textural contrast to the soft cake-like biscuit, making each bite a perfect harmony of soft and slightly crisp.
Your Ultimate Shopping List: Sourcing the Best Ingredients
The quality of your final honey jumbles is directly proportional to the quality of your ingredients. Here is your guide to building the ultimate dough and icing.
| Ingredient | Quantity & Specification | Why It’s Important |
|---|---|---|
| All-Purpose Flour | 4 cups | The structure of the biscuit. |
| Unsalted Butter | 150g, softened | Provides richness and tenderness. |
| Honey | 1 cup (preferably a flavorful variety like leatherwood or manuka) | The star flavor and key to moisture. |
| Brown Sugar | 1/2 cup, firmly packed | Adds a caramel-like depth to the sweetness. |
| Milk | 1/2 cup | Hydrates the dough and contributes to softness. |
| Egg | 1 large | Binds the ingredients and adds structure. |
| Baking Soda | 2 tsp | The primary leavening agent for rise. |
| Ground Ginger | 2 tsp | Provides the signature warm, spicy kick. |
| Ground Cinnamon | 1 tsp | Adds classic warmth and complexity. |
| Mixed Spice | 1 tsp | A blend that typically includes coriander, caraway, allspice, and cloves. |
| Icing Sugar | 2 cups, sifted | For the signature hard-setting royal icing. |
| Egg Whites | 2 large (or aquafaba for egg-free) | The base for the royal icing, creating a hard, smooth finish. |
| Pink Food Coloring | A few drops | For the iconic pink stripes. |
Essential Equipment
- A large mixing bowl
- An electric mixer (hand or stand)
- A rolling pin
- A ruler and a pizza cutter or sharp knife for cutting strips
- Baking trays lined with parchment paper
- A cooling rack
- Piping bags or small zip-lock bags for icing
The 7-Secret Master Recipe: Your Path to the Best Honey Jumble Biscuits
Follow these steps meticulously. This process is designed to build the perfect texture, shape, and flavor from the ground up.
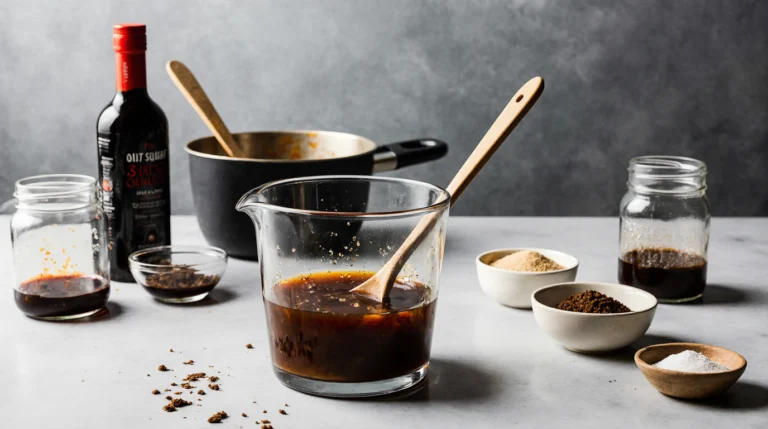
Secret 1: The “Melted Infusion” Method
- Activate the Flavors: In a medium saucepan over low heat, combine the 1 cup of honey, 1/2 cup of brown sugar, 150g of butter, and the spices (2 tsp ginger, 1 tsp cinnamon, 1 tsp mixed spice). Heat gently, stirring, until the butter has melted and the sugar has dissolved. Do not allow it to boil. This first secret step ensures the spices are “bloomed,” releasing their full aromatic potential into the fat and sugar, which will carry the flavor evenly throughout the dough. This creates a far more robust flavor than simply adding dry spices to the flour.
Secret 2: The Controlled Cool-Down
- Cool to the Perfect Temperature: Remove the pan from the heat and stir in the 1/2 cup of milk. Allow this mixture to cool until it is just lukewarm to the touch. This second secret is critical. If the mixture is too hot, it will cook the egg when added, scrambling it and ruining the dough’s texture. A lukewarm base ensures a smooth, emulsified batter.
Secret 3: The Enriched Dough Base
- Combine Wet Ingredients: Once the honey mixture is lukewarm, beat in the one egg until the mixture is smooth.
- Incorporate Dry Ingredients: In a large bowl, whisk together the 4 cups of flour and 2 teaspoons of baking soda. Make a well in the center and pour in the liquid honey mixture. Use a wooden spoon or spatula to mix until a soft, slightly sticky dough comes together. The dough will be softer than a standard cookie dough—this is normal and essential for a soft biscuit.
Secret 4: The Chilled Rest for Flavor and Shape
- Rest for Flavor Development: Wrap the dough in plastic wrap and refrigerate for at least 1 hour, or up to overnight. This third secret serves two purposes: it allows the flour to fully hydrate, resulting in a more tender crumb, and it gives the spices time to meld and deepen, creating a more complex flavor profile for your honey jumble biscuits. A chilled dough is also much easier to roll and shape without sticking.
Secret 5: The Signature Knot-Shaping Technique

- Roll and Cut: Preheat your oven to 180°C (160°C fan-forced / 350°F). Lightly flour your surface and rolling pin. Take half the dough and roll it out into a rectangle about 1cm (just under 1/2 inch) thick.
- Create the Strips: Using a ruler and a sharp knife or pizza cutter, cut the dough into long strips about 2cm (3/4 inch) wide.
- The Twist and Tuck: Take one strip and gently roll it back and forth on the bench with your hands to even it out and lengthen it slightly. Carefully tie it into a loose knot, ensuring you don’t pull it too tight, or it will unravel during baking. Tuck the ends under. This shaping is what defines an authentic honey jumble biscuit recipe.
Secret 6: The Perfect Bake for a Soft Finish

- Bake with Space: Place the shaped knots on parchment-lined baking trays, leaving room for a small amount of spread. Bake for 10-12 minutes. The fourth secret is to underbake them slightly. They are done when they are just firm to the touch and lightly golden around the edges. The tops may still look a little soft—this is key to maintaining their cake-like softness as they cool.
Secret 7: The Cooling Crucible
- Cool Completely on the Tray: This is the fifth and most crucial secret for texture. Let the biscuits cool on the baking tray for 10 minutes before transferring them to a wire rack to cool completely. Moving them too early can cause them to break, and the residual heat in the tray continues to cook them gently, setting their structure without drying them out.
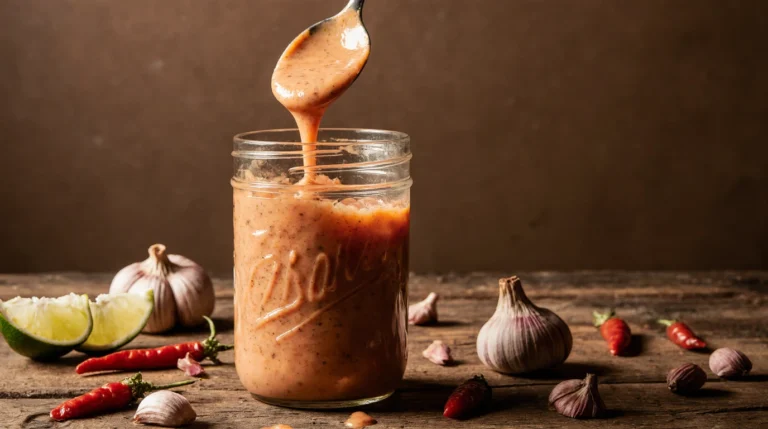
The Iconic Icing: Mastering the Pink and White Finish

No Honey Jumble Recipe is complete without the signature icing.
- Make Royal Icing: In a clean, grease-free bowl, beat the 2 egg whites (or aquafaba) until frothy. Gradually add the 2 cups of sifted icing sugar, beating on low speed at first, then increasing to high once combined. Beat for 5-7 minutes until the icing is thick, white, and holds stiff peaks.
- Divide and Color: Divide the icing in half. Leave one half white and tint the other half with a few drops of pink food coloring.
- The Striping Technique: Spoon each color into a separate piping bag or small zip-lock bag with a tiny corner snipped off. Ice the top of each cooled biscuit with a thick layer of white icing. Immediately, pipe three parallel lines of pink icing across the white. Use a toothpick to drag perpendicularly through the pink lines, first in one direction, then the other, to create the classic feathered pattern. This technique creates the iconic look reminiscent of Honey Jumbles Arnott’s.
Expert Tips and Troubleshooting for the Perfect Honey Jumble Biscuit Recipe
- My Dough is Too Sticky to Handle: This is common. Ensure you chilled the dough for the full hour. When rolling, use a light dusting of flour on your hands, the rolling pin, and the surface. The dough should be soft but manageable after chilling.
- My Biscuits Spread Too Much or Lost Their Shape: This could be due to the dough being too warm when it went into the oven. Ensure it is properly chilled. Also, check that your baking soda is fresh, as old leavening agents can work inconsistently.
- The Icing is Too Runny: Your icing sugar may have been insufficiently sifted, or you may need to add more. The icing should be thick enough to hold a sharp peak. If it’s runny, beat in more sifted icing sugar a tablespoon at a time until it reaches the correct consistency.
- Can I Make Them Ahead? Absolutely! The un-iced biscuits keep very well in an airtight container at room temperature for up to a week, thanks to the honey. You can also freeze the un-iced biscuits for up to 3 months. Ice them on the day you plan to serve them for the best presentation.
A Brief History of a Beloved Biscuit
While the exact origins are debated, honey jumbles have been a staple in Australian and New Zealand homes for generations. They represent a style of spiced honey biscuit with roots in medieval European baking, where honey was a common sweetener before the widespread availability of sugar. The commercial version, Honey Jumbles Arnott’s, helped cement their place in the national consciousness, making the shape and pink icing instantly recognizable. Baking them at home with this honey jumble biscuit recipe is a way to connect with this rich culinary history. For other recipes that turn simple ingredients into beloved family favorites, explore our collection at My Chicken Recipes.
Conclusion: Your New Go-To Nostalgic Treat
You have now journeyed through the complete creation of the ultimate Honey Jumble Recipe. From the secret of blooming the spices to the precise shaping technique and the iconic icing, you are equipped with the knowledge to recreate a classic with confidence and love.
This honey jumble biscuit recipe is more than a set of instructions; it’s an invitation to create new memories around a timeless treat. It proves that the most cherished foods are those made with attention, care, and a dash of nostalgia. So, preheat your oven, gently warm that honey, and get ready to fill your kitchen with the unforgettable, spiced aroma of homemade honey jumbles.
What’s your favorite memory associated with honey jumbles? Did you master the knot-tying technique? Share your baking stories and photos in the comments below!