Perfect Grilled Chicken Strips: The 15-Minute Guide to Juicy Tenders & Marinade Secrets
Table of Contents
Introduction: Unlock the Secret to Fast, Flavorful Grilled Chicken Strips

Nothing says summer like the sizzle of grilled chicken tenders on the grill. Yet too often, chicken strips turn out dry or bland. The secret to perfect results isn’t complicated—it’s about a quick chicken tender marinade and knowing how to grill chicken strips properly. With the right technique, you’ll know how long to grill chicken strips and exactly how long to cook chicken tenders on grill to achieve juicy, flavorful results. In just 15 minutes, you can enjoy tender, delicious grilled chicken strips any time of year.
The 15-Minute Promise: Speed, Flavor, and Juiciness
This guide is built on a single, powerful promise: to take you from raw chicken to perfectly grilled, juicy tenders ready to eat in a quarter of an hour. This isn’t about cutting corners; it’s about efficiency. We’ll leverage the science of rapid flavor infusion and the high efficiency of direct-heat grilling to create a meal that tastes like it took hours to prepare. This method is designed for busy weeknights, last-minute meal prep, or any time you crave incredible flavor without the wait. Say goodbye to long marination times and the guesswork of grilling.
What You’ll Learn: Mastering Tenders and Marinades
By the end of this article, you will have a complete toolkit for grilling chicken strips. You will understand the crucial difference between using chicken tenderloins and chicken breasts, and how to prep them for even cooking. We will unlock the secrets behind creating marinades that penetrate the meat in minutes, not hours, infusing every bite with flavor. You’ll master the grill, learning how to achieve a perfect sear without overcooking the delicate chicken. Most importantly, you will learn the one non-negotiable rule—monitoring internal temperature—that guarantees juicy results every single time.
Why Grilled Chicken Strips are Your Weeknight Hero
Chicken strips, or tenders, are the unsung heroes of fast, healthy cooking. Their small size and uniform shape mean they cook incredibly quickly and evenly. They are a fantastic source of lean protein, making them a cornerstone of a balanced meal. It’s no surprise that Americans consume more chicken than any other protein, a trend that has been rising since the 1960s. As a family-friendly main dish, grilled chicken tenders are universally loved, adaptable to countless flavor profiles, and perfect for adding to a salad, wrap, or pasta dish. Their versatility makes them an ideal choice for meal prepping, providing a ready-to-go protein for days of healthy lunches and dinners.
The Foundation: Choosing and Preparing Your Grilled Chicken Strips for Success
Before the flame ever touches the food, the path to perfect grilled chicken strips begins at the cutting board. The choice of cut and a few moments of essential preparation are the foundational steps that separate mediocre results from truly exceptional ones. This initial phase sets the stage for even cooking, maximum flavor absorption, and that coveted juicy texture.
Chicken Tenderloins vs. Chicken Breasts: Making the Right Choice
When the recipe calls for “grilled chicken strips,” you have two primary options: pre-packaged chicken tenderloins or boneless, skinless chicken breasts that you cut yourself. Understanding the difference is key to managing your prep and cooking.
- Chicken Tenderloins (Tenders): These are the small strips of meat located on the underside of the chicken breast. They are naturally tender, lean, and perfectly portioned for quick grilling. Their small, relatively uniform size is their greatest advantage, ensuring they cook rapidly and evenly. The only minor drawback is a small, tough white tendon that runs through each piece. While edible, removing it can improve the texture.
- Chicken Breasts: Boneless, skinless chicken breasts are a more economical and widely available option. By slicing a breast into strips yourself, you gain complete control over the thickness and size. The key to success here is uniformity. Aim to cut strips that are about 1 to 1.5 inches wide. This ensures that every piece of chicken on the grill cooks at the same rate, preventing some from drying out while others remain undercooked.
For ultimate convenience and tenderness, true chicken tenders are the superior choice. For budget-friendliness and control over size, slicing your own chicken breasts is an excellent alternative. Either way, the goal is to have pieces of chicken that are similar in size and thickness.
Essential Prep for Even Cooking
Once you’ve selected your chicken, a couple of simple preparation steps are non-negotiable for achieving a great sear and juicy interior.
- Trimming: If using chicken tenderloins, take a moment to remove the white tendon. It’s a simple process: hold the exposed end of the tendon with a paper towel for grip, slide the tines of a fork around it, and pull the meat away from the fork. The tendon should slide right out. If using chicken breasts, trim away any excess fat or gristle before slicing them into strips.
- Patting Dry: This is arguably the most critical and often-skipped step in protein preparation. Before marinating, use paper towels to pat the chicken strips completely dry on all sides. Moisture on the surface of the chicken will steam on the hot grill, effectively preventing the Maillard reaction—the chemical process that creates the deep brown, flavorful crust we associate with grilling. Dry chicken sears; wet chicken steams. A dry surface ensures better contact with the grill grates, leading to superior grill marks and a more robust flavor.
These foundational steps take only a few minutes but pay massive dividends in the final product, setting your grilled chicken tenders up for unparalleled success.
Unlocking Flavor & Juiciness: Marinade Secrets Revealed
A great marinade does more than just add flavor; it’s an insurance policy against dry chicken. For thin cuts like chicken tenders, a well-formulated marinade can work its magic in a surprisingly short amount of time. The key is to use ingredients that act quickly to tenderize, moisturize, and season the meat, creating a delicious barrier that protects the chicken from the intense heat of the grill. With chicken being a staple in so many households—70% of Australian households serve it at least twice a week—having a go-to quick marinade is a game-changer.
The Science of a Speedy Marinade: Why These Ingredients Work Wonders

To create a marinade that delivers maximum impact in minimum time, it’s essential to understand the role of its core components. A rapid-activation marinade relies on a simple, powerful formula: Fat + Acid + Salt + Aromatics.
- Fat (Olive Oil): Olive oil is the cornerstone of a great chicken marinade. It serves multiple purposes. First, it helps transfer fat-soluble flavors from your aromatics (like garlic and herbs) onto the surface of the chicken. Second, it adds moisture and prevents the lean chicken from drying out on the grill. Finally, it helps prevent the chicken from sticking to the hot grates. A good quality olive oil acts as a carrier for flavor and a protector of texture.
- Acid (Lemon Juice, Vinegar): Acidity is the tenderizing agent. Ingredients like fresh lemon juice or a splash of vinegar work to break down the tough muscle fibers on the surface of the chicken. This not only makes the meat more tender but also allows the other flavors in the marinade to penetrate more effectively. However, caution is crucial. Too much acid or too long a marination time can have the opposite effect, “cooking” the exterior of the chicken (like in ceviche) and turning it tough and rubbery. For quick marinades, a balanced amount is key.
- Salt: Salt is the ultimate flavor enhancer. Through the process of osmosis, salt helps draw the marinade’s flavors deeper into the meat. It also helps the chicken retain its own natural moisture during cooking. It doesn’t just make the marinade salty; it makes the chicken taste more like itself, amplifying its savory qualities.
- Aromatics (Garlic, Herbs, Spices): These are the personality of your marinade. Minced garlic, onion powder, dried herbs like oregano and thyme, smoked paprika, and black pepper all contribute layers of complexity. For a speedy marinade, powdered spices and finely minced fresh ingredients work best as they have more surface area to release their flavors quickly.
Rapid-Activation Marinade Recipes: Flavor in a Flash

These recipes are designed to work in as little as 5-10 minutes, using pantry staple seasonings that are potent and effective. Each recipe is formulated for approximately 1.5 pounds of chicken tenders.
Recipe 1: Classic Lemon Garlic Herb Marinade This is a bright, fresh, and versatile marinade that pairs well with everything.
- Ingredients:
- 1/3 cup olive oil
- Juice of 1 large lemon (about 3 tablespoons)
- 3-4 cloves garlic, finely minced or grated
- 1 teaspoon dried oregano
- 1/2 teaspoon dried thyme
- 1 teaspoon salt
- 1/2 teaspoon black pepper
- Instructions: In a medium bowl or a large zip-top bag, whisk together the olive oil, lemon juice, minced garlic, oregano, thyme, salt, and pepper. Add the chicken strips and toss to coat thoroughly.
Recipe 2: Savory Smoked Paprika Marinade This marinade offers a deeper, smokier flavor profile that is incredibly satisfying.
- Ingredients:
- 1/3 cup olive oil
- 1 tablespoon soy sauce (or tamari)
- 1 tablespoon apple cider vinegar
- 1 teaspoon smoked paprika
- 1 teaspoon garlic powder
- 1/2 teaspoon onion powder
- 1 teaspoon salt
- 1/2 teaspoon black pepper
- Instructions: In a bowl or zip-top bag, combine the olive oil, soy sauce, vinegar, smoked paprika, garlic powder, onion powder, salt, and pepper. Whisk until emulsified, then add the chicken and ensure it’s fully coated.
Marinade Timing: The 5-Minute Flavor Infusion
Forget the notion that chicken needs to marinate for hours. Because chicken tenders are so thin and porous, they absorb flavor remarkably quickly. For the recipes above, all you need is 5 to 10 minutes of marinating time at room temperature while your grill preheats. This is the essence of the 15-minute promise.
Simply place your prepared chicken in a bowl or zip-top bag, add the marinade, and toss to coat. Let it sit on the counter. The slightly warmer temperature of the kitchen (compared to the refrigerator) helps the flavors infuse more rapidly. Any longer than 30 minutes with these acidic marinades, and you risk compromising the texture. This short marinating window is the secret to getting a deeply flavorful chicken recipe on the table in record time.
The 15-Minute Grill Masterclass: Achieving Perfect Doneness and Grill Marks
With your chicken strips bathed in a rapid-infusion marinade, it’s time to head to the grill. This is where speed and precision converge. Grilling chicken tenders is a fast-paced process; a few minutes is all it takes to go from raw to perfectly cooked. The goal is to achieve a beautiful exterior char and distinct grill marks while keeping the inside succulent and tender.
Pre-Grill Checklist: Setting Up for Success
Success on the grill is all about preparation. Before the first piece of chicken touches the grate, ensure you have everything in place.
- Clean The Grill: Start with clean, well-oiled grates. Use a sturdy grill brush to scrub off any residue from previous cooking sessions. Debris not only imparts off-flavors but is also a primary cause of sticking.
- Preheat to Medium-High Heat: A properly preheated grill is non-negotiable. For both gas and charcoal grills, you want to aim for a consistent medium-high heat, around 400-450°F (200-230°C). This high temperature is crucial for creating an instant sear, which locks in juices and develops flavor. Allow your grill to preheat for at least 10-15 minutes with the lid closed.
- Oil the Grates: Even with oil in the marinade, an extra layer of protection against sticking is a good idea. Fold a paper towel, dip it in a high-smoke-point oil (like canola or avocado oil), and use long-handled tongs to wipe it across the hot grates right before you add the chicken.
- Prepare Your Tools: Have everything you need grill-side: a platter for the raw chicken, another clean platter for the cooked chicken, long-handled tongs for flipping, and most importantly, a reliable instant-read digital meat thermometer.
Grilling Techniques for Tenders: The Perfect Sear and Even Cook

The actual grilled chicken tenders process is brief and requires your full attention.
- Remove Excess Marinade: As you take the chicken strips from the marinade, let any excess liquid drip off. Too much marinade on the surface can cause flare-ups and prevent a good sear. Do not pat them dry; you want the oil and seasonings to remain.
- Place on The Grill: Arrange the chicken strips on the hot grates in a single layer, leaving a bit of space between each piece. Overcrowding the grill will lower the temperature and cause the chicken to steam rather than sear. Lay them perpendicular to the grates to maximize grill marks.
- Grill for 2-4 Minutes Per Side: Close the grill lid and let the chicken cook undisturbed for 2 to 4 minutes. The exact time will depend on the thickness of your tenders and the precise temperature of your grill. You’re looking for the chicken to release easily from the grates; if it’s sticking, it likely needs another minute to develop a proper sear.
- Flip and Finish: Using your tongs, flip each tender over and cook for another 2-4 minutes on the second side. The chicken cooks very quickly, so stay close and be prepared to act fast.
The “No-Dry” Guarantee: Monitoring Internal Temperature

This is the single most important technique for guaranteeing juicy grilled chicken tenders. Color and feel are unreliable indicators of doneness. The only way to know for sure is to use an instant-read meat thermometer. Poultry is safe to eat when it reaches a final internal temperature of 165°F (74°C).
To get an accurate reading, insert the thermometer probe into the thickest part of a chicken strip, being careful not to touch any bone (if applicable). Because the chicken’s temperature will continue to rise by a few degrees after you remove it from the heat (a phenomenon known as carryover cooking), it’s best practice to pull the tenders off the grill when their internal temp hits 160-162°F.
The Crucial Rest: Locking in Juices
Once the chicken reaches its target temperature, immediately transfer it to a clean platter or cutting board. Now comes the final test of patience: let it rest. Tent the chicken loosely with aluminum foil and let it sit for 3-5 minutes before slicing or serving.
This resting period is critical. During cooking, the muscle fibers in the meat tighten and push moisture toward the center. Resting allows these fibers to relax and reabsorb those flavorful juices. Slicing into the chicken immediately will cause all that moisture to spill out onto your cutting board, resulting in a drier final product. This short, simple step is the final seal on your “no-dry” guarantee.
Troubleshooting & Pro Tips for Perfect Grilled Chicken Strips
Even with a solid recipe and technique, grilling can present challenges. Knowing how to anticipate and solve common problems is what separates a novice from a grill master. Here’s how to troubleshoot the most frequent issues and elevate your grilled chicken tenders from great to flawless.
Avoiding Stickage: Grate Prep and Oil
The dreaded moment when your beautiful chicken tears apart as you try to flip it is entirely preventable. Sticking is almost always a result of one of three issues: a dirty grill, an under-heated grill, or a lack of oil.
- The Triple-Clean Method: Before preheating, scrub the grates with a grill brush. After preheating, scrub them again to remove any loosened, carbonized bits. Finally, right before adding the chicken, give them one last quick brush. This ensures the cooking surface is as smooth and clean as possible.
- Patience is a Virtue: A properly preheated grill helps create a sear that allows the chicken to release naturally. If you try to flip a tender and it resists, don’t force it. Give it another 30-60 seconds. That resistance is a sign that the crust hasn’t fully formed yet.
- The Oiling Strategy: As mentioned before, oiling the grates is your best friend. Use a neutral, high-smoke-point oil. Don’t douse the grates, which can cause flare-ups. A thin, even coating applied with a paper towel and tongs is all you need. Combining this with the olive oil in your marinade creates a double layer of non-stick protection.
Uneven Cooking? How to Manage Delicate Tenders
Every grill has hot spots and cool spots. For delicate, fast-cooking items like grilled chicken tenders, managing this uneven heat is key to a uniform result.
- Know Your Grill: Pay attention to where your food cooks fastest. Typically, the back of the grill is hotter than the front. When you place your chicken on the grill, you can use this to your advantage. If you cut your own strips from chicken breasts and have some thinner or smaller pieces, place them in the cooler zones.
- Strategic Positioning: Arrange the tenders so the thickest parts are facing the hottest area of the grill. This helps the entire strip cook more evenly.
- Rotate and Reposition: Don’t just flip the chicken; move it around. If you notice some tenders are browning much faster than others, move them to a cooler part of the grill to finish cooking. Similarly, move the lighter-colored strips to a hotter spot to help them catch up. This active management ensures every single piece comes off the grill perfectly cooked.
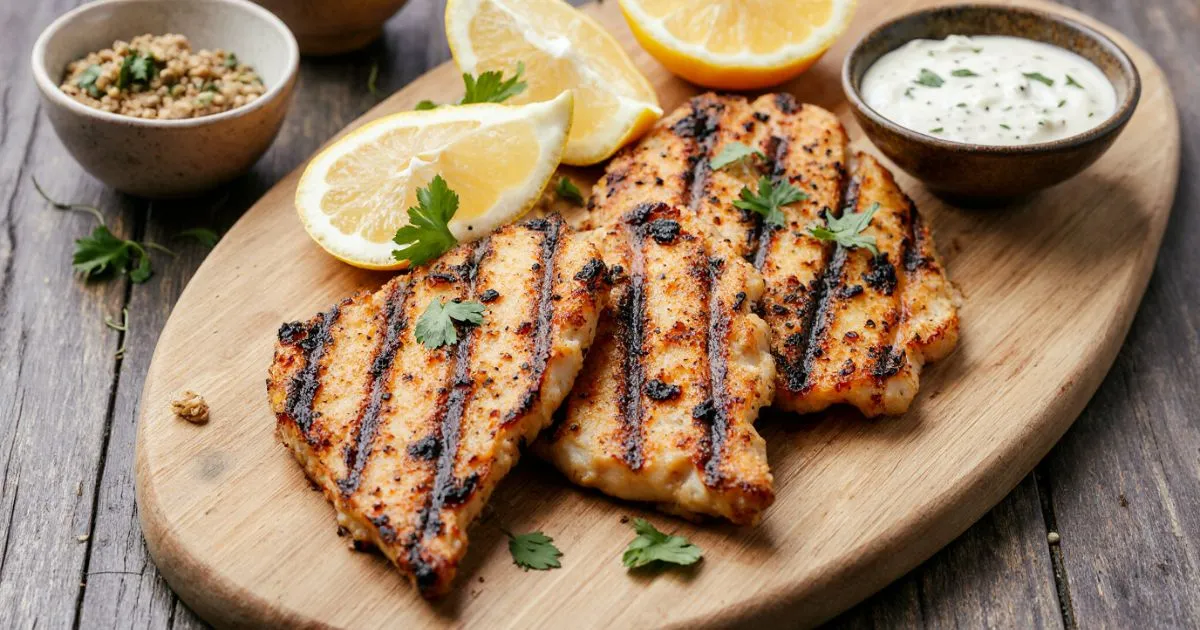
Achieving Uniform Grill Marks: The Art of the Angle
Those coveted, diamond-patterned crosshatch grill marks aren’t just for show; they indicate a great sear and concentrated flavor. Achieving them is a matter of technique and timing.
- The 45-Degree Rule: For professional-looking marks, place your chicken tenders on the hot grates at a 45-degree angle to the bars.
- The Quarter Turn: Cook for about 1.5 to 2 minutes, until sear marks are established. Then, using your tongs, rotate each tender 90 degrees (so it’s now at a 45-degree angle in the opposite direction) without flipping it over. Cook for another 1.5 to 2 minutes.
- Flip and Repeat: Flip the chicken over and repeat the process on the other side. This method does require more hands-on time and may not align perfectly with the “15-minute” total time promise, but it’s the professional technique for achieving flawless presentation. For a quicker meal, a single placement and flip will still yield delicious results with simple parallel marks.
Alternative Quick Cooking Methods
No grill? No problem. You can achieve similar results indoors using a grill pan or a heavy-bottomed skillet. The increasing adoption of smart appliances and AI for meal planning, as noted by the National Chicken Council, shows a trend toward versatile cooking, and these methods fit right in.
- Grill Pan: A cast-iron grill pan is your best bet. Preheat it over medium-high heat for at least 5 minutes until it’s very hot. Add a light coating of oil and cook the chicken tenders using the same timing and temperature-monitoring techniques as you would on an outdoor grill. You’ll get great sear marks and flavor, but be sure to turn on your kitchen’s exhaust fan, as it can produce some smoke.
- Cast-Iron Skillet: A regular cast-iron or other heavy-bottomed skillet also works beautifully. Preheat the skillet over medium-high heat, add a tablespoon of oil, and once it shimmers, carefully place the chicken strips in the pan. Sear for 3-4 minutes per side until a deep golden-brown crust forms and the internal temperature reaches 160°F. While you won’t get grill marks, you’ll develop a fantastic all-over crust.
Beyond the Grill: Quick Serving & 15-Minute Meal Prep Ideas

Perfectly grilled chicken strips are not just a main course; they are a versatile ingredient that can anchor a multitude of quick and healthy meals. Their convenience and popularity are reflected in the fact that nearly half of all U.S. restaurants featured chicken tenders as of late 2024. Here’s how to turn your 15-minute grilled chicken into a full-fledged dinner or a week’s worth of easy lunches.
Speedy Dinner Companions
Once your chicken is off the grill and resting, the final phase of your 15-minute meal comes together. These companions require minimal effort and can be prepared while the grill preheats or the chicken cooks.
- The Ultimate Salad: The classic pairing. While the chicken cooks, toss together a bed of mixed greens, cherry tomatoes, sliced cucumber, red onion, and bell peppers. Top with the warm, sliced grilled chicken tenders and a simple vinaigrette. The warm protein slightly wilts the greens, creating a delicious texture contrast.
- Quick Wraps or Tacos: Warm some tortillas on the grill for the last minute of cooking. Slice the grilled chicken and stuff the tortillas with it, along with shredded lettuce, diced tomatoes, avocado, and a dollop of Greek yogurt or salsa.
- Protein Power Bowls: Start with a base of pre-cooked quinoa, brown rice, or farro. Top with the sliced chicken, steamed broccoli, corn salsa, and a drizzle of your favorite sauce (like a peanut-lime dressing or a spicy aioli). This is an excellent way to use up leftover grains and vegetables.
- Simple Pasta Toss: While the chicken grills, boil some pasta. Once cooked, drain it and toss with a bit of olive oil, pesto, cherry tomatoes, and the sliced grilled chicken. A sprinkle of Parmesan cheese finishes it off for a hearty, satisfying meal.
15-Minute Meal Prep Hacks
The beauty of this grilled chicken tenders recipe is its scalability. Doubling or tripling the batch takes only a few extra minutes on the grill but provides a foundation for several days of effortless meals.
- The “Cook Once, Eat Thrice” Method: Grill a large batch of chicken strips on Sunday. Once cooled, store them in an airtight container in the refrigerator. Now you have the protein component for your meals ready to go.
- Day 1: Chicken salad for lunch.
- Day 2: Chicken wraps for a quick dinner.
- Day 3: Chicken and veggie skewers for another easy meal (just reheat briefly).
- Portioning for Success: Immediately after cooking and cooling, portion the chicken into individual glass containers. To each container, add a serving of a complex carbohydrate (like quinoa or sweet potato) and a fibrous vegetable (like roasted broccoli or green beans). This creates grab-and-go meal prep containers that are balanced, healthy, and ready when you are.
- Flavor Variety: If you’re making a large batch for meal prepping, consider splitting the chicken and using two different marinades. This prevents flavor fatigue and keeps your meals interesting throughout the week. One batch can be the zesty Lemon Garlic Herb, while the other can be the smoky Savory Paprika.
Frequently Asked Questions About Grilled Chicken Strips
Here are answers to some of the most common questions about grilling chicken tenders, ensuring you have all the information you need for foolproof results.
How Long Should Chicken Strips Stay in a Chicken Tender Marinade?
For marinades containing a significant amount of acid (like lemon juice or vinegar), the marinating window is surprisingly short. Due to their thinness, chicken tenders should marinate for a minimum of 5 minutes but no more than 30-60 minutes. If you go beyond an hour, the acid can begin to “cook” the exterior of the chicken, resulting in a tough, mealy texture. If you need to prep ahead, it’s better to use a marinade that is lower in acid (more oil-and-herb based), in which case the chicken can safely marinate in the refrigerator for up to 4 hours.
What is the safe internal temperature for chicken?
The single most important rule of cooking poultry is ensuring it reaches a safe internal temperature. According to food safety guidelines, chicken is safe to consume when a meat thermometer inserted into the thickest part reads 165°F (74°C). To ensure maximum juiciness, it’s recommended to pull the chicken from the grill when it reaches 160-162°F. The internal temp will continue to rise by a few degrees during the resting period (carryover cooking), reaching the safe 165°F threshold without overcooking.
Can I use frozen chicken tenders?
While you can technically cook grilled chicken tenders from frozen, it is not recommended for grilling. Grilling relies on high, direct heat to cook quickly. Frozen chicken will not cook evenly in this environment; the outside will likely burn long before the inside thaws and reaches a safe temperature. For the best results—even cooking, proper searing, and flavor absorption—it is essential to use fully thawed chicken tenders. If your chicken is frozen, thaw it completely in the refrigerator overnight or use the defrost setting on your microwave before proceeding with the prep and marinating steps.
How do I store leftover grilled chicken strips ?
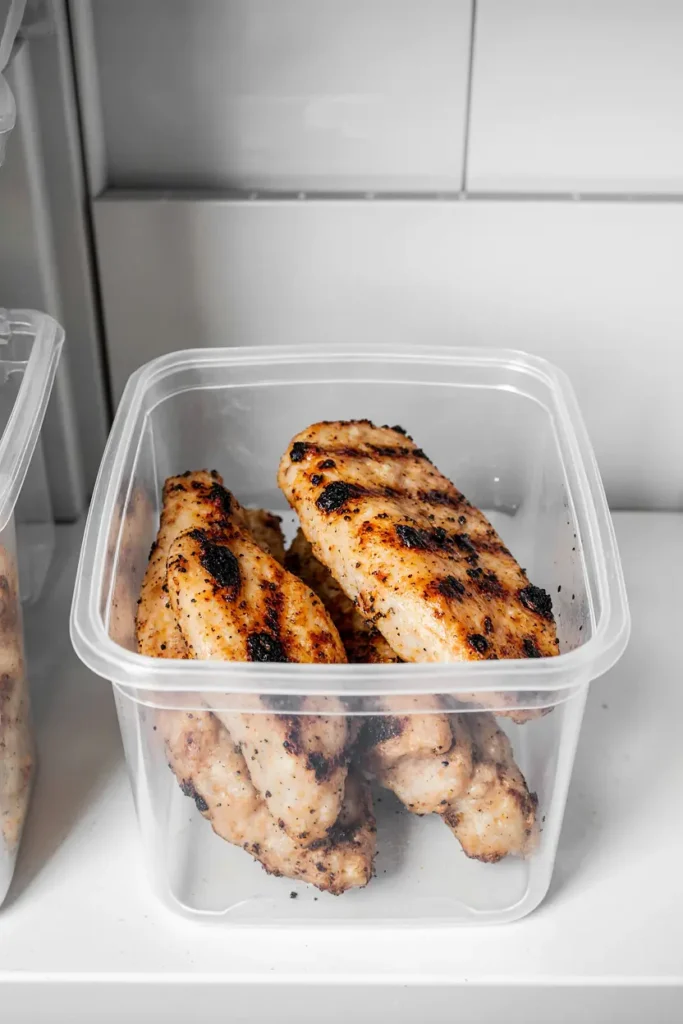
Proper storage is key to enjoying your leftover grilled chicken strips. First, allow the chicken to cool down to room temperature, but don’t leave it out for more than two hours. Once cooled, place the chicken strips in an airtight container or a heavy-duty zip-top bag. Stored properly in the refrigerator, the grilled chicken will stay fresh and delicious for 3 to 4 days. You can enjoy it cold straight from the fridge in salads or sandwiches, or reheat it gently in a skillet, the microwave, or an air fryer.
Conclusion
The pursuit of perfect grilled chicken strips—juicy, flavorful, and fast—doesn’t have to be an elusive culinary goal. By demystifying the process and focusing on a few core principles, this 15-minute guide has equipped you with everything you need to achieve consistent, delicious results. We’ve shown that the secret isn’t about long hours of marination or complicated grilling maneuvers; it’s about efficiency and science. It’s about using a rapid-activation marinade that leverages the power of fat, acid, and salt to infuse flavor in minutes. It’s about mastering the high heat of the grill to create a perfect sear while relying on the unwavering accuracy of an internal temperature probe to guarantee succulent, perfectly cooked chicken every time.
You now have the knowledge to select and prep your grilled chicken tenders for success, the recipes to create vibrant marinades from pantry staples, and the techniques to conquer the grill. More importantly, you have a strategy to reclaim your weeknights with a meal that is both incredibly quick and profoundly satisfying. The next step is to put this knowledge into practice. Fire up your grill, whisk together a marinade, and experience for yourself how simple it can be to create a healthy, protein-packed meal that your whole family will love. Embrace the 15-minute promise and make dry, bland grilled chicken a thing of the past.